Maker Monday: Not-So-Spooky Night Lights
The glowing faces of Not-So-Spooky Night Lights can add a bedtime smile with this week’s Maker Monday activity.
The kid-designed project begins with a small empty jar. Baby food jars work well, but we preferred going with plastic containers. Add a colorful decoupage layer of tissue paper, then let creativity rule the day.
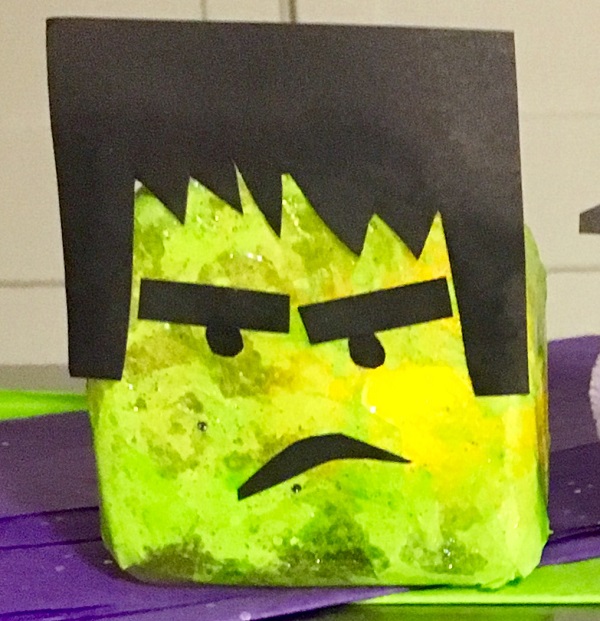
Accessorize your creatures with features cut from construction paper. Googly eyes give a silly touch to a gruesome face. Make a spider night light with pipe cleaner legs. Add a witch’s hat or Dracula’s fangs. Use white tissue for a glowing ghost or orange tissue to make a bright jack-o-lantern.
The Not-So-Spooky Night Lights are inexpensive to make. We found everything we needed at the Dollar Tree store.
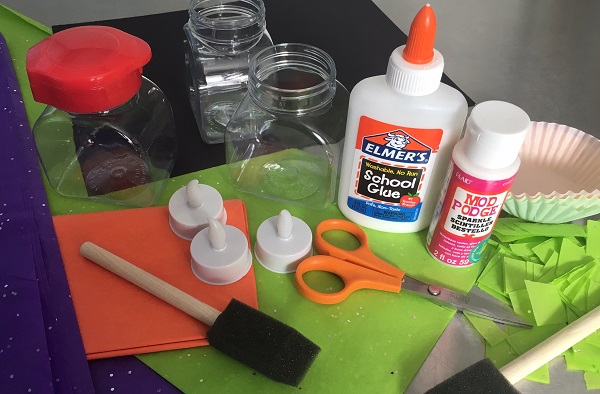
Supplies:
Small empty jars
Scissors
Tissue paper, cut into approximately 1-inch squares
School glue
Mod Podge
Foam paintbrushes
Battery-powered tea lights
Construction paper
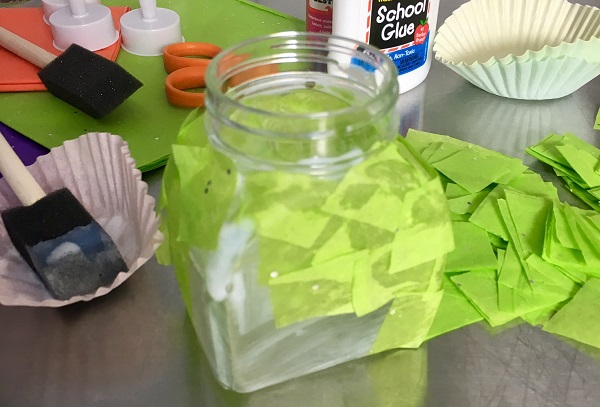
Squeeze a small amount of school glue into a little bowl. (Cupcake papers make an easy-to-clean, disposable “bowl.”) Paint the sides of a jar with the glue, using a foam paintbrush. Cover the glue with overlapping pieces of tissue paper. Add dabs of glue as needed for well-layered coverage.
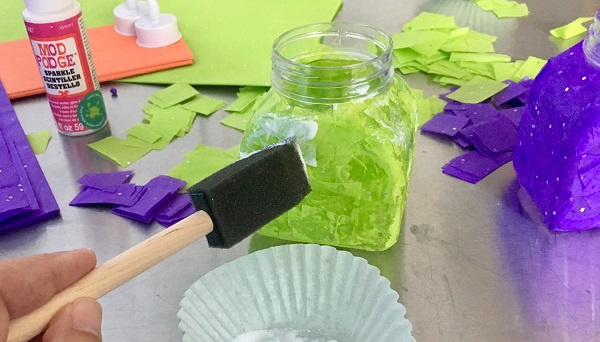
Allow the glue and tissue to dry. Paint on a layer of Mod Podge to seal edges and give a smoother finish. We used a sparkle version to add a bit of extra shimmer.
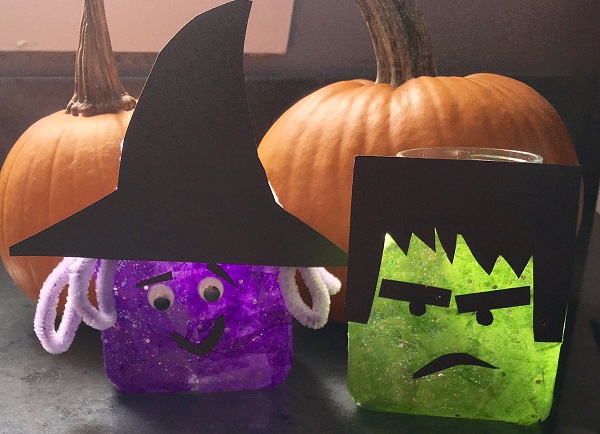
Once dry, begin to give your night light personality. Add a witch’s hat, a Frankenstein hairline, pipe cleaner hair, a funny face. Switch on a tea light and set inside for a friendly glow.
That’s not so spooky, is it?
For more Maker Monday projects and other fun stuff for kids, visit the Kidsburgh Activities page.
