If you have cool craft projects your kids love, share them with Kidsburgh! Email us your maker activities, and we’ll publish the best here.
Maker Monday: Cardboard Tube Binoculars
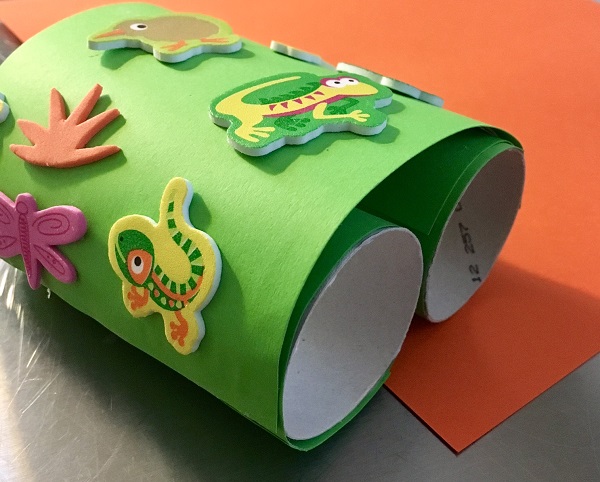
Exploring the outdoors is a wonderful experience for kids, whether it’s in the backyard or on a path in a neighborhood park. There’s so much to see — birds, bugs, clouds, squirrels. Using these Cardboard Tube Binoculars might not make objects look bigger, but they do help to focus.

Supplies:
3 cardboard tubes
Scissors
Colored paper
School glue or glue stick
Stickers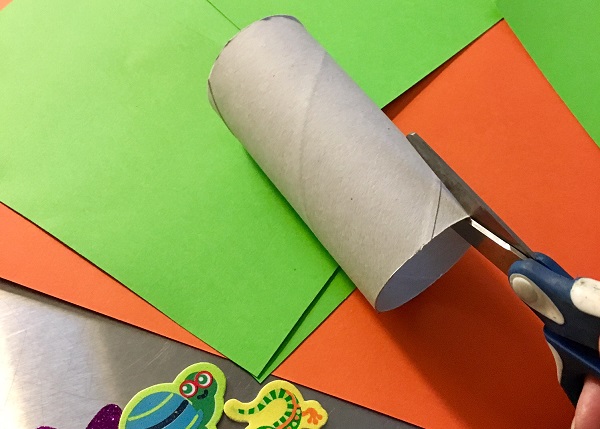
Cut one cardboard tube lengthwise.
Cut the paper into sizes to fit the two cardboard tubes and the back of the cut tube. Glue paper onto the two tubes. Glue the paper onto the back of the cut tube so that the cardboard curves inward.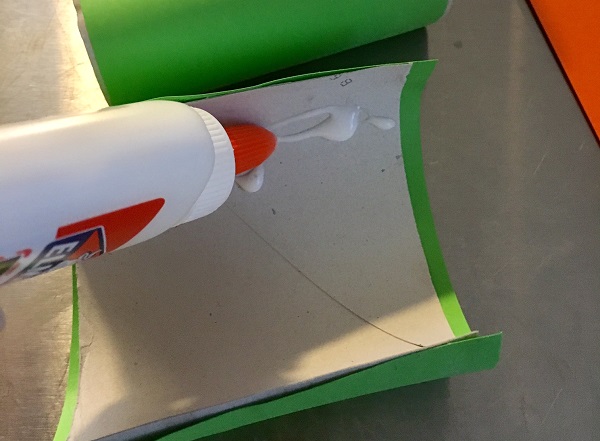
Add glue to the back of the cut tube and place the two tubes within, side by side so they fit nice and snug, with the cut tube wrapping around them.
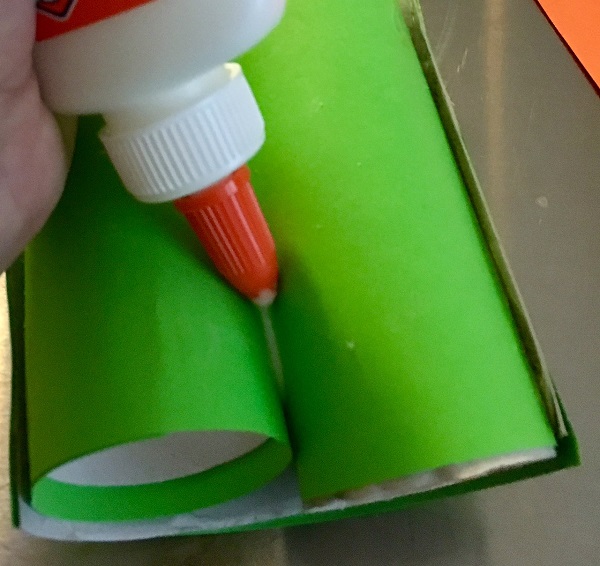
Add a bit of glue between the two tubes to help stabilize the binoculars. Press and hold until the glue adheres.
Apply stickers, and your Cardboard Tube Binoculars are ready for an outing.
This craft is easy to personalize, allowing kids to be creative. Here are a few ideas: Instead of covering the tubes with paper, paint them with a camouflage pattern or cover with glitter. Or wrap the tubes with white paper and reach for markers or crayons. Or cover them with duct tape for a more industrial look. Use patterned card stock for another design direction.
Once given the basic plan, kids are great at coming up with ideas they want to pursue. And that’s what making is all about!
For more Maker Monday projects and other fun ideas, visit the Kidsburgh Activities Page.
Tags
